With Mother Nature “teasing” us with on-again, off again spring-like weather, we start getting the itch to get our rigs ready for the summer camping season. Hopefully last fall you took the proper steps to drain the water system or add RV antifreeze, take out the house batteries, and batten down the hatches. Now it’s time to wake that sleeping giant from its long winter’s nap and get ready to hit the road!
Related Video: How to Winterize an RV
Depending on how you stored your rig last fall, there are different “first steps” that you will take. If you removed the batteries and have them in your garage, make sure you get them ready by doing a multi-stage charge prior to installing them back in the rig. Check out the videos in the electrical section on the site for this procedure.
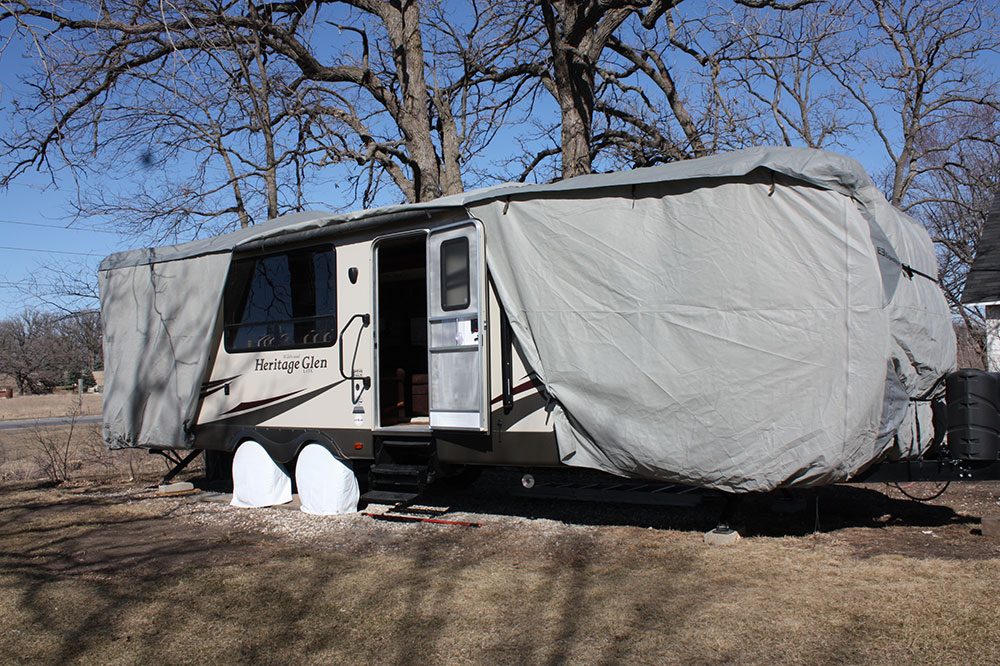
Next, if you have a cover, remove it and check all tires for proper inflation. It’s not uncommon for an RV tire to lose 2psi per week just sitting. Also check the sidewall for weather checking and the tread. This is also a good time to have the bearings checked and repacked on trailers.
Related Blog: RV Tire Care Tips: Don’t Take Your Tires for Granted
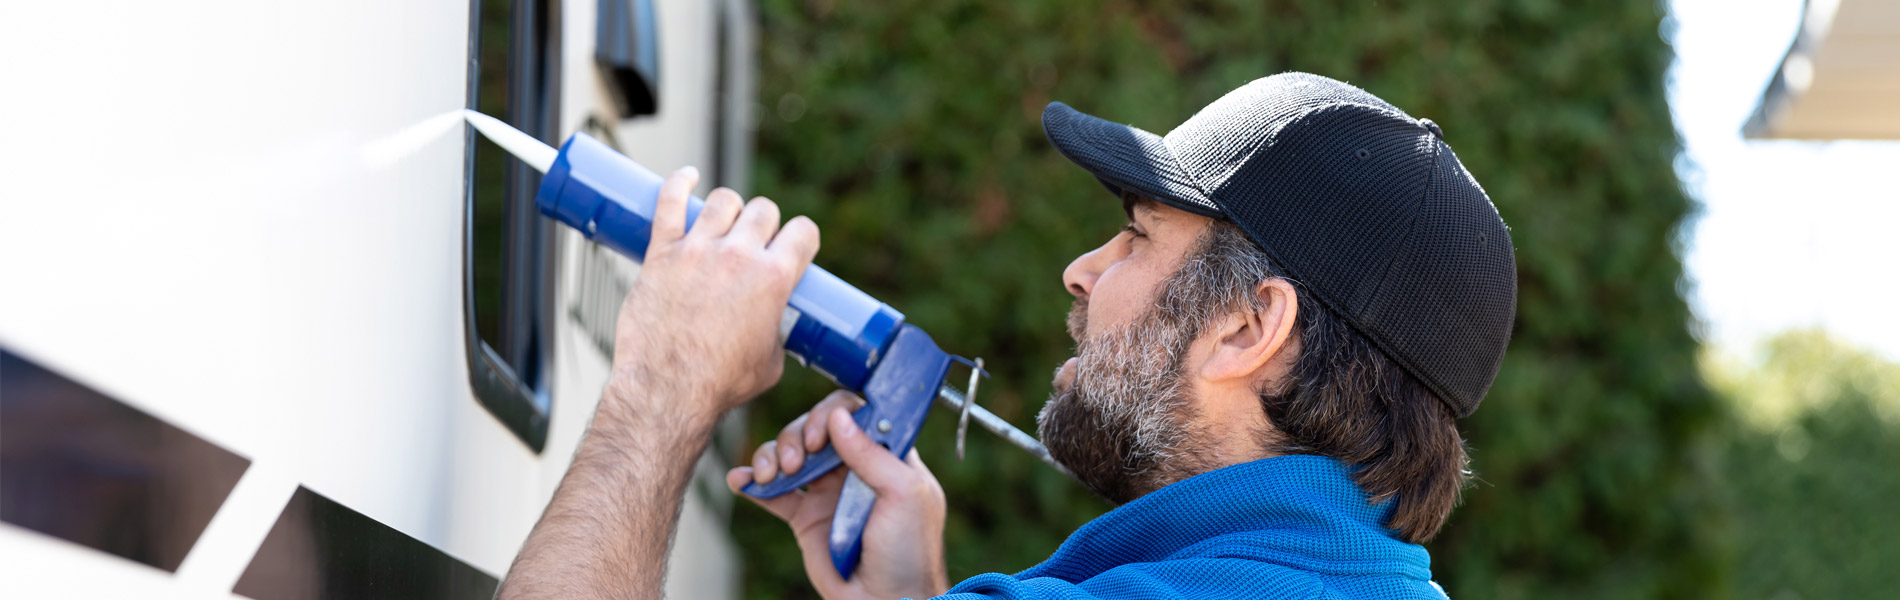
It’s also a good idea to thoroughly inspect the rig inside and out for leaks, gaps in sealant, and rodents. If you stored the vehicle inside, you probably will not see any moisture leaks; however you still want to check all the sealant and rubber trim such as slideroom seals. Check inside upper cabinetry for roof to sidewall leaks, the front and back caps, and especially the floor around the slideroom openings. If you see soft floors or moisture damage, get it taken care of immediately.
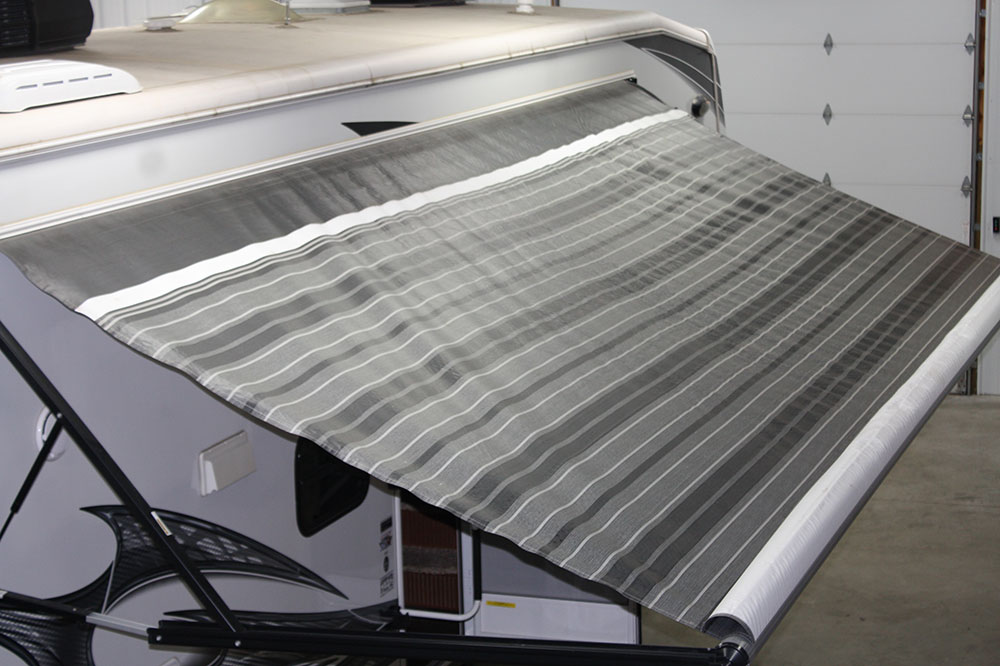
If your slideroom has an awning cover, run the room out and check for condensation or even mold as it was stored. If it was closed wet, it could have black mold that needs to be cleaned. Same thing for any patio awnings as well – open the awning and dry or clean as needed.
Next, check all your appliances for loose connections and musty odors, and make sure they are clean and ready to start up in whatever mode they operate. Make sure any gas valve to the appliance is open, the circuit breaker is on, and any fuses are good. Here is where I take a little more caution by applying an approved LP leak solution to my refrigerator, stove, water heater, and furnace connections. You do not want to use soapy water as this is not recommended by the appliance manufacturers. This will bubble if there is a leak in the connection and give you a quick heads up to get it fixed.
Related Video: Checking for Leaks in an RV Propane Tank
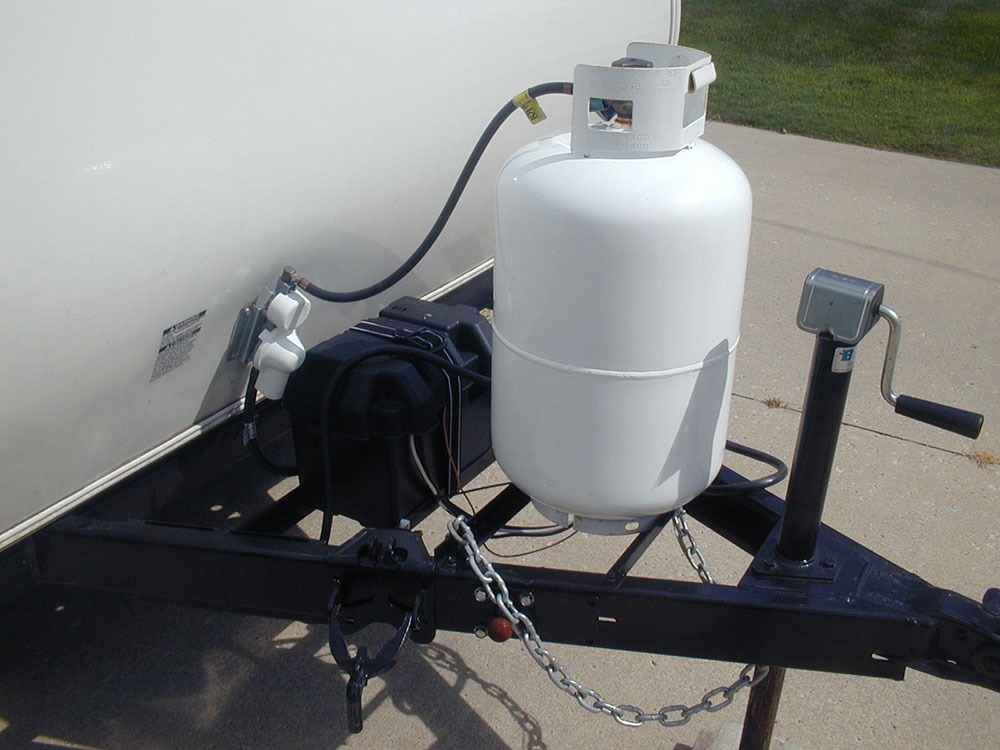
Hopefully you turned off the LP tank/s in the fall so now is the time to turn them back on…slowly! Your LP line has an excess flow valve that is designed to shut the line off if the flow through it exceeds normal operation in case of a break in the line. Opening the valve at the LP tank/cylinder can provide excess pressure and shut the valve. Now you can test the individual appliances.
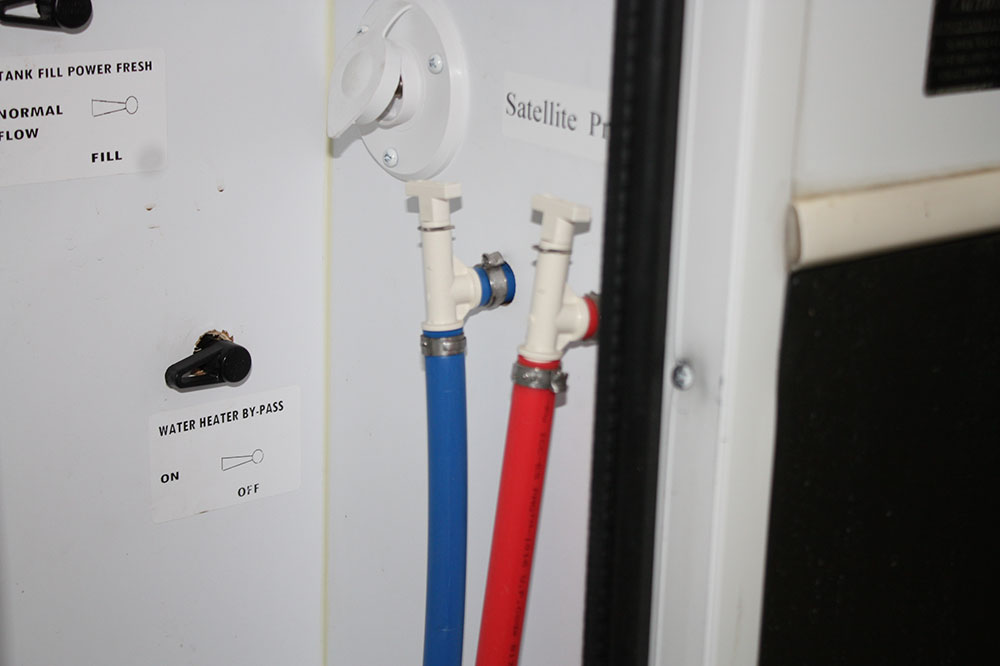
If you used RV antifreeze last fall, you will want to run fresh water through the system, opening each faucet and the toilet until clear water runs through. Keep in mind you’ll need to reinsert the water heater drain plug and turn the water heater bypass switch back if your rig is so equipped.
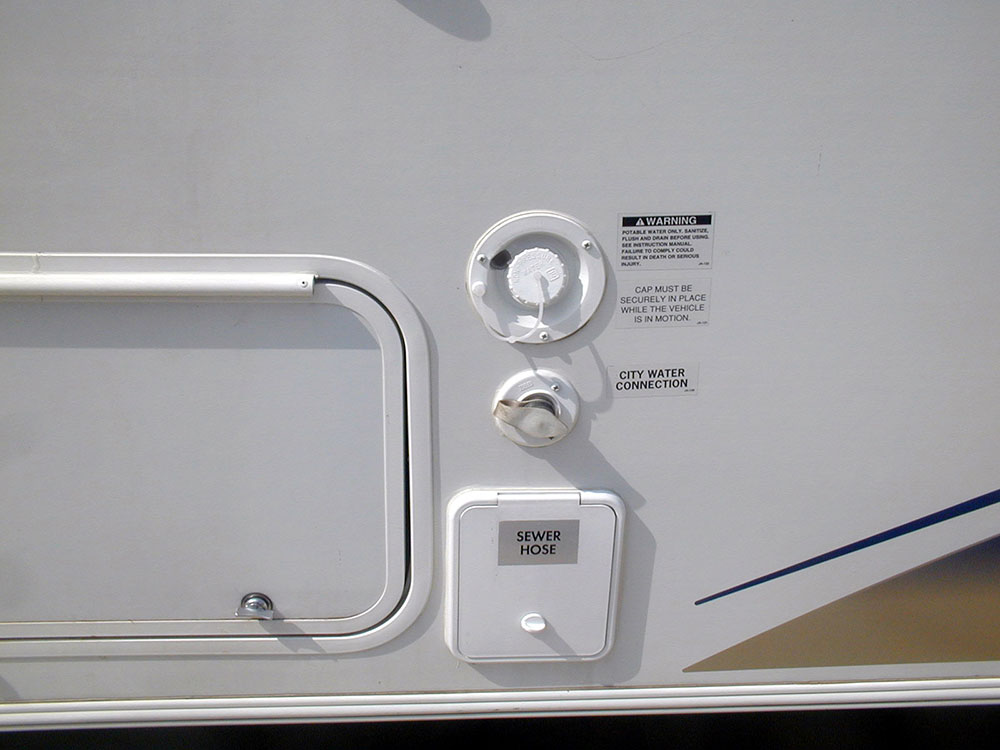
If you used pressurized air to blow out the lines, you will need to run water through the system to purge the air in the lines. Make sure you close any drain valves in the dump station or in-line valves. Start by connecting the city water source first, this will purge the air and the RV antifreeze faster. Once you connect the city source, open each faucet, both hot and cold until a steady stream of clear water runs through. Make sure you open all faucets, shower, toilet, and exterior shower as well.
Related Video: Quick Release Adaptors for Your RV City Water Inlet
During this operation, visually inspect the water lines and connections underneath each location for leaks. Also look underneath the coach to see if any drain valves are still open. Now fill the fresh water tank to half and run the water pump through the same procedure. When you close a faucet after purging that line, check to make sure the water pump shuts off after pressurizing the line. If it doesn’t shut off, or “cycles” on and off, you have a valve open or a leak somewhere.
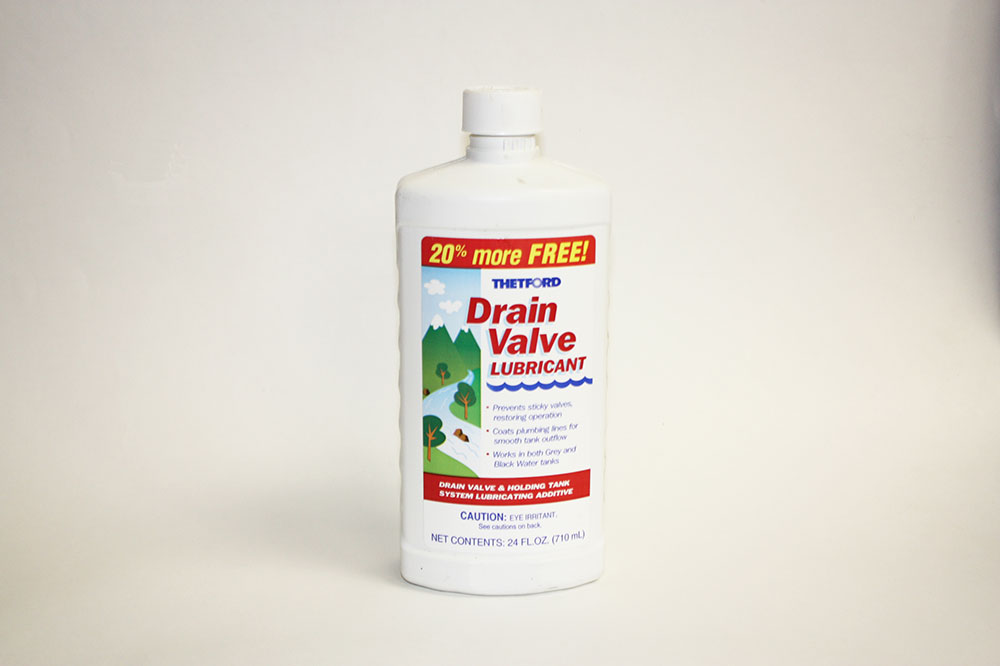
Dump stations are generally low maintenance; however it’s a good idea to check a few areas before getting a surprise on your opening day dump! If you viewed the video on maintenance of your toilet and dump valves, you would have put some valve conditioner in the toilet and dump tanks to lubricate the rubber gasket at the spade valve. If not, you will definitely want to check the seal of those valves with clean water! If the valves are not sealing properly, you will have black and gray water leaking past the valve and when you open the cap to connect the sewage hose… YUCK! Check the valves and get the aftermarket cap that has the small water hose cap. And check your sewer hose – freezing temperatures can snap a hose easily and cause some major cleanup.
Related Video: RV Dump Valve Troubleshooting
You’ll also want to visually inspect the typical operation of your entrance steps, TV antenna, satellite dish, roof vents, and other items. Make sure to change the batteries in the smoke detector and CO detector, and check the function of the LP leak detector too.
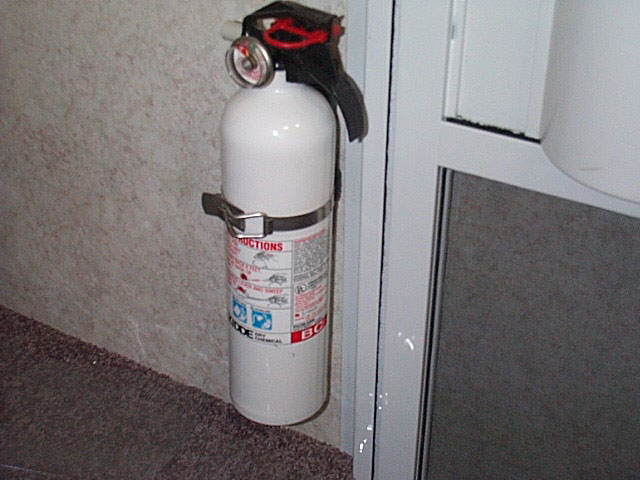
And the last item which I feel is the most important… check your fire extinguisher. Take your fire extinguisher out, turn it upside down, and hit the bottom to dislodge and mix the solution. This should be done yearly otherwise it will settle and “cake” in the bottom and will not be efficient. Just because the gauge is in the green, doesn’t mean it will work properly.
Overall, if you take the time to properly winterize your rig, it makes it easier to bring it back out for summer use. Here’s to the summer season!
Have something to add to the story? Leave a comment or share with us on Facebook!
I have this travel trailer and the window valances are falling off. I did note they use an L bracket with one screw on the valance and one screw in the thin wall. What’s the best way to re- attach these?
Hello Paul,
Thank you for your question. The ‘Ask an Expert’ section is currently for paid members of our online community. By becoming a member, you will also receive access to our full-length videos, articles, and discounts on products.
To enjoy these benefits, please click on the special offer below:
https://go.rvrepairclub.com/C39618
Once you have signed up, click on Contact Us at the bottom of our website to submit your question.
If you have any further questions, please chat, email, or call Customer Service.
Sincerely,
Sarah
RV Repair Club Video Membership
residential Fridge wont cool or reset. Tried turning it off for 10 minutes and back on. It has power but no cooling
Any ideas? Changed the fuse also.
Hi Bonnie. If there is for sure power to the outlet for the fridge, typically indicated by the fridge controls or lights being on, and there is still no cooling from it then there is an internal component failure. It could be the compressor, leak in the system or failed control board or wiring. Residential fridges are much different than RV fridges and require certified technicians to repair do to the complication of parts and safety with the coolant and voltage. The best things you can do to check on your own would be the voltage to the fridge and making sure it is above 110v when trying to operate.
Dan
RV Repair Club
Hi , do you have videos specific to the RV units themselves? I’m new again to the RV camping experience having owned a truck and camper years ago. I’m curious about spring startups for water systems etc .thx I’m enjoying ur videos but am hoping to find something closer to what I have , cheers. Tony
Hello Tony,
Here’s what the experts had to say about your question:
We unfortunately don’t have videos specific to certain RV’s. There are literally thousands of different RV’s so it would be hard to cover all vehicle specific components. We try to offer videos and information to pertain to all types of RV’s. Most of the components are the same in all RV’s but manufactures make their own style of things. Are you just looking for information on how to get your water heater ready for the spring use? If so, you first need to flush the water lines of any anti-freeze. Once the lines are clear you will want to install the water heater drain plug and then open the bypass valves. Most RV’s have bypass valves either on the back of the tank or in the wetbay that close off the water lines to the tank when pumping anti-freeze through the system. You need to open these valves to allow water into the tank. You then open a hot faucet to purge out any air in the tank. Once solid water is coming out of the lines, the tank is ready for use. It is always a good idea to check the outside burner tube and the rest of the components to make sure they are free of debris and are in good working condition.
https://www.rvrepairclub.com/?s=water+heater
Sincerely,
Dan
RV Repair Club Technical Expert
Also open the Emergency window door a few times,they like to stick ones in a while.
starts up runs a short time and shuts off Heat system works and stove
Hello Walter,
Thank you for contacting us.
What is the year, make, model or your RV?
If you have any other concerns, please contact us at 1-855-706-3536, or chat with us on our site.
We greatly appreciate your business!
Sincerely,
Lindsay
RV Repair Club Video Membership
Hot water heater kicks in runs a short time then shuts down not heating
stove and heat work fine
Hello Walter,
Here’s what the experts had to say about your question:
There could be a few things to cause this. It could be that the thermostat is cutting out too soon. The thermostat attaches to the side of the tank, gas thermostats are on the front of the tank on all models. The best thing to go is test the 12v to the thermostat after it shuts off. If there is voltage to the thermostat and not through it, then the thermostat is the issue. If there is no voltage to the thermostat then the issue is most likely with the control board. If there is voltage through the thermostat then you will want to check the voltage through the ECO next and then the gas valve. What ever doesn’t allow voltage through it is the issue. We do have some water heater troubleshooting videos that could help as well.
https://www.rvrepairclub.com/?s=water+heater
Sincerely,
Dan
RV Repair Club Technical Expert
It’s also important to inspect the underbelly for defects, exposed water lines, tanks etc. And the most important ,electrical wires connections going to each axels and all wires going to drving lights and power converter. Guy
Where would my LP gas detector be located?
Hey Bruce!
Could you supply us with the year, make, and model of your RV?
Thank you!
Jessica
RV Repair Club Video Membership
Nice Videos!
Is there a specific set of instructions for de-winterizing the water system (including reefer) on my RV? First time on this site, and I’ve always paid to have it done, but now am retired with some time on my hands and want to do it myself. Thanks in advance.
Dear Robert,
Thank you for your patience. In response to your question-
There aren’t really specific instructions for de-winterizing. This is much easier done than winterizing. All you have to do is flush out the system of the anti-freeze. You will want to connect water to either the city inlet or fill the fresh tank and then pump it through. You just go to each faucet one at a time and run the line until clear water comes out of it. Make sure to do this for everything, kitchen faucet, toilet, bathroom faucet, bathroom shower, outside shower etc. As for the fridge it depends on how it is set up. Some manufactures install shut-off valves to the water line of the fridge and then just put a drain on it so anti-freeze doesn’t have to go into the fridge. Others you would have to run the lines until clear as well. If you have any water filters in the system or the fridge, wait until all of the lines are clear before replacing. Once the lines are flushed, you will want to put the drain plug back into the water heater and then open up the bypass valves to the tank. Not every RV has the bypass valves but some require these valves to be open to allow water flow back into the tank. Once water can go into the tank you are good to go. I hope this helps!
Sincerely,
Dan
RV Repair Club Technical Expert
08 Georgetown 350ds bunkhouse. Where are the drain points and is there a valve to alter when filling the holding tank? Manual is useless and when I hook up the hose to the tank fill fitting it sounds like the water is going thru the pump to the tank??? Some help, Please….
Dear Darel,
Thank you for your patience. In response to your question-
I unfortunately don’t have access to a plumbing diagram for that RV but you would want to check by the tank or look underneath the coach and see if you can locate the drain hose. The valve for the drain can be at the end of the hose or is located next to the tank itself. On some RV’s there are some valves that need to be turned when filling the tank and there are some that do not. The valves should be visible and labeled in the wet bay with the water fill connection. If there are no valves in that area, then there shouldn’t be any valves that are needed to be turned. They will be labeled with “tank fill” if there are valves for it. Water shouldn’t be going into the pump when filling the fresh tank, if it is I would look for a valve that diverts the water. If the pump is lower than the tank the water may get to the pump but it won’t flow through the pump unless the pump is bad. The pump will only allow water through when it is on. I did find a video from Forest River that explains their fresh fill systems, it may help watching this as well. I will post the link below. I hope this helps!
https://www.youtube.com/watch?v=DoLVxE3lvOs
Sincerely,
Dan
RV Repair Club Technical Expert
Have a short in the water heater, replaced the frayed burned wire this did not correct the problem and i have switched over to propane to get hot water. My question is how do I remove the hot water heater for further repair or correction. Hope you can answer this
Thank You
Jim Tuohy
Dear Jim,
Thank you for your patience. In response to your question-
Water heaters aren’t too hard to remove. You have to remove the outside bracket, there will be screws going around the outside edge of the tank for Atwoods or you will have a few long screws on the outside for Suburban tanks. You will probably have to score the sealant around the tank with a knife to free the outside cover. Once the outside cover is removed you would have to disconnect the gas line, make sure the propane tanks are off. This is all you have to do on the outside of the tank. You then gain access to the back of the tank and disconnect all plumbing fittings at the tank and then all wires. Atwood tanks will have a black junction box at the bottom of the tank with 120v wires that will need disconnected and Suburban will have the 120v wires at the top of the tank in a metal junction box. Each tank will also have 12v wires on the back that will have to be disconnected. Suburban tanks have the control board in a box around the tank area, Atwood is on the front but will have the incoming wires from the back that have to be disconnected. Once everything on the back is disconnected, the tank can be pulled out of the opening from the outside. Because of the sealant and putty behind the cover it can sometimes be hard to get started so using a putty knife can help. It is a tight fit so be careful not to cut any wires or damage the insulation around the tank. I hope this helps!
Sincerely,
Dan
RV Repair Club Technical Expert
Wondering how to prime my fresh water pump that’s used for non pressurized water? Such as when dry camping with only electric.
Dear William,
Thank you for your patience. In response to your question-
If you have a siphon hose at the pump there is an easy way of doing this. Turn the valves on for the siphon hose and get a bucket of water and a funnel. Poor water into the hose and turn the pump on, this is all it needs sometimes. There have been times where I have had to put water into the hose and blow into it while the pump is running and once it frees up it will draw water from the tank when positioned back. If this doesn’t help or you don’t have a siphon hose, it is best to take the pump out and inspect the valve body and switch to make sure there is nothing causing the valve to cease up. We have a video showing how to take apart a pump that will help go through the steps and troubleshooting. I will post the link below. If this still does not help, it is probably something wrong with the motor and the pump will need replaced. I hope this helps!
https://www.rvrepairclub.com/video/rv-water-pump-troubleshooting-tips-007923/
Sincerely,
Dan
RV Repair Club Technical Expert
trying to buy a toilet
I feel like need to re-seal the top of my TT as I didn’t cover it during the off season. It’s dirty but I don’t want to wash it & create water damage inside. A buddy of mine says I can caulk around the edge but I’m not sure exactly what to do.
My water pump runs but won’t prime.
Dear James,
Thank you for your patience. In response to your question-
If you have a siphon hose at the pump there is an easy way of doing this. Turn the valves on for the siphon hose and get a bucket of water and a funnel. Poor water into the hose and turn the pump on, this is all it needs sometimes. There have been times where I have had to put water into the hose and blow into it while the pump is running and once it frees up it will draw water from the tank when positioned back. If this doesn’t help or you don’t have a siphon hose, it is best to take the pump out and inspect the valve body and switch to make sure there is nothing causing the valve to cease up. We have a video showing how to take apart a pump that will help go through the steps and troubleshooting. I will post the link below. If this still does not help, it is probably something wrong with the motor and the pump will need replaced. I hope this helps!
https://www.rvrepairclub.com/video/rv-water-pump-troubleshooting-tips-007923/
Sincerely,
Dan
RV Repair Club
Locating Hot water by-pass valve
I’m just trying to find out video to show me how to put a new battery in, to get it started to move it about 8 miles
Not getting air flow in the heat cycle in the living room back vent
Hello,
To provide more specific troubleshooting information on your air flow issue we need the make, model, and year of your RV and what specific “heat cycle” appliance you are having an airflow issue? If it’s the furnace and a vent that is supplied with a ribbed tube, it’s probably a kink in the tubing? If it’s a heat strip for a ducted roof air, then that is a difficult issue to troubleshoot without a hands on inspection.
Thanks,
David
RV Repair Club Video Membership
When running the water from the fresh water tank there is little pressure and it wants to suck the the line flat. If I put the line for winterizing in a five gallon bucket it draws fine and pressure returns. The RV has a cover running the entire length so I haven’t seen the water tank. RV is new to me and the original owner said he never used the fresh water tank and in fact never had water in it.
Need to know how to replace the outside lower wall with aluminum or sheet medal.
Hello Jerry,
This is a fairly major repair and not something easily described in a Q&A such as this. Most of the aluminum skin used on RVs is called Mesa which is ribbed and connected with a “Pittsburg” seam created by a special machine. If you are going to attempt this on your own, I would recommend hiring someone from a metal fabrication facility or someone from a plumbing and heating source that has metal working expertise and a metal crimper that might be able to fabricate a fastening method.
Thanks,
David
RV Repair Club Video Membership
Servicing wheel bearings
my bathroom switches are not working and fan
hen i start generator it starts but doesnt keep running
Hi I am looking for some information about bringing luster/shine into my aluminum siding now that summer is nearly here…suggestions appreciated. I see picture and stories but no details about making trailers look amazing.
I have a drivers door with a window over it. It leaks and now has the inside behind the door damp how do I fix this and get it sealed back up
thank you
We just started out. And I had the dealer do the full winter set. OK, I been looking every where on what to do myself to start for the summer to start again to go camping? Tell me how to do it without taking it back into the dealer cost again. Thanks. Joe
Where is the manual crankout for my slide-out. I’ve purchased this used unit.
What size batteries are recommended for the Cummins engine? Don’t have unit close by, and will need to take 2 12 volt batteries to get it started.
Please advise how you would add your bleach to your fresh water tank to sanatize your water system. The problem I have is my water tank fill is a pressurized type (just like your city water hookup) not a pour in type. Any ideas on how to add the bleach would be greatly appreciated. Thank you.
If you have the closed system, you should still have a gravity feed
somewhere? I do know that for a couple years Winnebago engineers did
not have one and there were quite a few complaints about adding
antifreeze! If you do not have a gravity feed to pour it into, use
the winterizing valve and tube. If you do not have one of those, I
suggest installing one as you will eventually need it for antifreeze as
well.
RV steps not working
Best sealant for sealing the inside of the shower. I have removed all of the old cracked sealant. I purchased PROFLEXRV sealant. Is this acceptable for sealing the shower?
There are two types of caulk used for sealing a variety of components in RVs and almost everyone calls them “Silicone”. Acrylic latex caulking is popular because it is easy to use, cleans up well with water, and is paintable. True silicone caulk remains more flexible and is and more impervious to moisture over time, but is not paintable due to the moisture resistance. The data sheet on the PROFLEXRV shows it’s paintable but does not show the type of component? I would recommend buying a silicone based caulk from you local home improvement store that is designed for bathroom/kitchen and is moisture and mold resistant.
on off switch in the camper to start the rv
The bedroom slide out when extended in the rain leeks onto the floor inside on the inside . The dealer advised we just slightly till the camper down somewhat on that side. but proper levelling seems important to us.
Would a slide awning help ? We don’t have one right now.
Thanks for you help.
John.
Hi John. You are correct, proper leveling is important for the refrigerator to operate properly and also to create a level base or chassis. You should always level and stabilize the rig before bringing the sliderooms out! If your base or chassis is not level, the sidewalls can get slightly twisted and your slide room “fights” the misalignment going in and out. I would suggest checking your seals all the way around the room to make sure nothing has pulled away from the flange, check inside seals on the flange that should push against the wall frame, and underneath. Yes an awning would help, but is probably masking the problem. Another thing to check is the squegge or flap between the room and the sidewall. Most manufacturers have this 2” flap that not only wipes the room off as it comes in, but is designed to help keep moisture out when extended. I’ve seen several models where the flap does not “switch” or move to the direction of the motion and moisture can get in that area. We did a video on installing a small piece of weatherstrip vertically on the side of the room and as the room goes in and out, it actually pushed the flap to the correct direction.
How do you get antifreeze into the black tank rinse inlet?
Hi Mark. Thank you for visiting the RV Repair Club and the opportunity to assist with your black water rinse question. To winterize the rig, you only need to put a little RV antifreeze down the toilet and shower drain to protect the valve in the black and gray water tank. You do not need antifreeze in the black water rinse or flush valve as it’s simply a female connection on the outside and sprayer on the inside which does not hold or trap water so it will not get damaged in cold weather.
The wide painted rubber trim on the back of my camper is peeling off, hanging down. I have some adhesive, but the strip is too short now. I am also afraid water might have seeped in along the plastic molding on the corner. Any suggestions appreciated. Thank you
Hi Susan. Thanks for visiting the RV Repair Club site and the opportunity to assist with your trim piece issue. I would suggest contacting your dealer or manufacturer to get a new piece of trim. Over time, the constant exposure to UV rays will dry the rubber components actually make them shrink. Take the old trim off and inspect for damage, most of the back trim pieces are not water sealant trims?
When our AC comes on it smells like oil. Anyone know why or what to do? Thanks.
Hi, Michelle. Thanks for visiting the RV Repair Club site and the opportunity to assist with your AC question. The first thing I would check is the return air filter. Depending on the model, it will either be in a separate “grated” vent on the ceiling, or on the unit itself. Make sure that is clean and has good air flow. Next, check to make sure the spring loaded mount bolts are tight. Take off the inside surrounding shroud/frame and you will see the bolts at the corners. The torque setting should be listed in your owner’s manual, however I just make sure they are hand tight. If they are loose, you could be getting air and moisture from the outside? Check the cooling fins on the back of the AC unit to ensure they are not flatted out or clogged with something which would make the unit run less efficient. Otherwise you might have a freon leak in the system which has oil in it and will give that smell which would require inspection by a certified technician.
This would pertain to any water heater I suppose. My husband isn’t home to tell me the Brand and Model#
We had our motorhome winterized, when they de-winterized we put right back into storage. Didn’t camp until August 8th. Filled up water and turned on hot water and it stunk awful. Guess the dealer didn’t drain the water heater like we asked and paid him to do when it was winterized. Appreciate any help you can give us.
Hi Donna. Thanks for joining the RV Repair Club and the opportunity to assist with your hot water odor issue. The smell could be from two things, stale water sitting in the water heater without oxygen and anaerobic bacteria letting off hydrogen sulfide which is the rotten egg smell. The other could be a deteriorated anode rod. Take the drain plug out and see if it has an anode rod that needs to be replaced. Otherwise, put 5 cups of bleach in your holding tank and fill it with at least 20 gallons of water. Then run the solution through the water heater and let it set for 24 hours. This will eliminate the smell and then dump the system and flush it with fresh water.
We are newbies to RV’ng and didn’t get the most thorough of demonstrations after purchase (retained even less). We were wondering if anyone could provide a step-by-step instruction (pix would be greatly appreciated) on how to sanitize the fresh water tank system, winterize the camper, and prepare it for use in the spring. We have found some videos and blogs, but they pertain to other campers and not the Starcraft AR-One which seems to be different is several respects.
Hi, Albert. Thanks for visiting the RV Repair Club site and the opportunity to assist with your winterizing question. Sanitizing the fresh water tank can be done in one of two ways. First use household bleach and pour about 5-6 cups of bleach into the gravity fill which will go to your fresh water tank. Then fill the tank to about 2/3 full and drive the unit around for a few minutes to mix everything up. Next, turn on the water pump and run the bleach solution through every faucet, line, and even the shower. Run it until you smell the bleach coming out. Then let the unit sit over night, this will sanitize the tanks and lines then you can drain everything and put in fresh water. The bleach smell will dissipate in a couple of days. You can also use the fresh scent bleach that doesn’t have the chlorine smell. Also, thetford makes a fresh water tank deodorizer which you can get at any RV supply company. Use the same method with this.
As for winterizing, there are several videos on the site that will show you the procedure which should be the same in your Starcraft. Either blow out the lines using an air compressor set at 40 psi, or fill the water tank with about 5 gallons of RV antifreeze, turn on the water pump, and open faucets one at a time until the pink stuff comes out! Make sure there is no existing water in the tank, just straight antifreeze! Hopefully your unit has a water heater bypass, otherwise you’ll need another 6 gallons!
I am a widow left with a 37ft.class A motor home, can’t get it started, what is wrong?
Hi, Mary. Thanks for visiting the RV Repair Club and the opportunity to assist with your motorhome issue. To provide more specific information I need to know the make, model, year, and chassis manufacturer. Also, does it crank over and won’t start, or nothing happens when you turn the key? If nothing happens, you will need to check the batteries. It may be the batteries were disconnected when the unit was last put into storage?
I just have a question hoping someone will know the answer. We have a 2014 Vengeance Toy hauler and the whole one side of the outside hard wall is cracked. Wondering if anyone knows why this would happen.
Hi, Maureen. Thanks for visiting the RV Repair Club and the opportunity to assist with your sidewall issue. If the fiberglass outer skin has a crack running the entire length it is most likely due to stress applied from the undercarriage twisting? The only way to tell is contact a Forest River dealership or the factory direct and conduct an alignment check of the framework. Forest River only offers a 1 year warranty to the original owner, however this may be a case they would get involved on a good will basis? This is not a very common problem.
goodwill from forest forget that heres a list of problems i,ve had & there response. total brake failure & worn out shoes, during 1st year. every part on axil had to be replaced. there response i pulled the 5th wheel with the brakes engaged . would not cover. my cost several hundred dollars. ever tried to pull a 5th wheel with brakes engaged & not be able to tell it? kitchen water holding tank clasped & had to be replaced,cause– air vent was put in drain under sink.they did take responsibility for this but took most of summer to fix because sending wrong tank several times. caulking need to replace some bad. on speaker phone i heard the order placed & the lady in cs said they only had enough for the campers they were building & would send some when they had extra. this is a diamond series rig, you can,t pick up that color of caulk at your local hardware store. 3 years now & no caulk. cs says none was ever ordered, i know better but so what send me the caulk i need! last summer i noticed delamanation at overhang & now on slid out & also on other side. most starting at frames windows ,but not all. had dealer check for possible cracks or holes. there are none. there response at first notification unit is 3 yrs old sorry. so in in airing my disgust with forest river, good luck with your problem. don,t be surprised they say unit was not level & caused frame to twist during the winter causing the wall to crack.
I bought a Forest River in June of 2018. By May of 2019, it was found that the frame was twisted before I bought is. The kitchen island sink was leaking inside the island. The CO detector alarmed all the time. The roof had a year and needed to be replaced. The AC/heat unit is a total piece of sh!t and is insanely loud.
The dealer forgot to send it back to the factory from October 2019 until I went in to see if they had any information on progress. It’s still there.
There’s a guy named Ron at the factory. I am thankful for him. He’s the only person I’ve met who I trust. I would be totally lost if not for Ron.
I have come to the conclusion that RVs are JUNK in general. I had a Brookstone Diamond 2013. It was JUNK to. So we customers are really left to our own devices when it comes to these things. If you don’t catch defects in the first year, you are totally on you own.
The turn signals are not working but the flashers do work as well as all other lights what could the trouble be??
Hi Emma. Thanks for visiting the RV Repair Club site and the opportunity to assist with your light problem. To provide more specific troubleshooting information I need to know the make of the RV, model, and year. If your rig is a trailer, you have a 5 or 7 pin connection and the hazard lights are a different pin than the turn signals and we can isolate the wires. If it’s a motorhome, then we have to verify the individual wires at the assembly.
Hi, Emma. Thanks for visiting the RV Repair Club site and the opportunity to assist with your turn signal. To provide more specific troubleshooting information I need to know the make, model, and year of your RV and what chassis you have. In the mean time, here are a few basic troubleshooting ideas. First check your 12-volt automotive fuse. Depending on the type of vehicle, turn signals could be on a separate fuse that your other lights. Second check your turn signal relay. This is typically a small block with pins located in the fuse panel but sometimes under the dash. If these are all good, it’s probably in the switch.
We have just taken our RV out of storage. Upon running the hot water system we get a foul smell what causes this and how do we fix it?
Hi, Emma. Thanks for visiting the RV Repair Club site and the opportunity to assist with your water smell issue. Typically the fresh water you use in both the water heater and fresh water tank comes from a campground source and is generally not soft water, rather water from a well with many minerals that when left sitting for the winter can cause some nasty smells. It’s possible that you have high levels of bacteria as well. There are some products on the market such as Thetford’s water treatment products however I would also suggest using the old fashioned method of 1/4 cup bleach to 1 gallon of water and make about 8 gallons of this and run it through your entire system. Let is sit for a day as well as many of the plastic water lines need to get refreshened as well.
When l turn on the air conditioner a very bad order comes out could there be a dead animal up there if so what do l do
Hi, Lynda. Thanks for visiting the RV Repair Club site and the opportunity to assist with your air conditioning issue. To provide more specific information, I need to know the make, model, and year of your RV and roof ac. If it’s a ducted roof ac unit, there could be something that crawled up into the duct and died like a mouse? About the only thing you can do to rid it is remove a vent and try to fish a vacuum hose through the duct. It could also be a smell coming from the compressor or motor of the unit that might have gone bad? Try to identify the smell, is it a burnt smell like oil or metal or sewer like decay? Another option for ducted roof ac units is to purchase or rent a snake video camera and see if you can find something in the ducts? They have become fairly affordable with units at Harbor Freight for about $90 and most home improvement stores carry some as well.
I have a older onan generator it only run as long as ihold start button
Hi Lawrence. Thanks for visiting the RV Repair Club site. To provide more specific troubleshooting information I would need to know the model and year of your generator and the rig as well. If you have to hold the start button to keep it running then I doubt the generator is actually running, rather the starter is turning the engine over and it sounds like it’s running, maybe sputtering for a little during the time but this will burn out your starter. The basics of troubleshooting a generator are gas and spark. Not sure if this is an onboard supplied by the gas tank, or portable, but make sure you have enough fuel. Some motorhomes require at least 1/2 full tank! Next, take the plug out and ground it to something on the generator and crank it to verify spark. If you have fuel and spark, then you probably have a varnished carb and will require additional service.
Check out the videos on the site…go into the search feature and type in generator and you’ll find several free version on troubleshooting.
Hope this helps.
I opened unit last week and refrig had a brown syrupy looking substance inside, I left door open a crack to avoid mold? What is brown stuff and where does it come from, thank you very much.
“Your comment is awaiting moderation” What does that mean? Hope this is not a dumb question but this has been on for days. Thank you
Hi Frank. Thanks for visiting the RV Repair Club. You did not provide the make, model and year of the refrigerator or RV, however I assume it’s an absorption (RV) type vs a compressor driven (residential) type? The absorption models have a cooling unit attached to the back of the ref and heat drives the liquid up the cooling unit into the freezer section gravitates to the main box so if it was stored, there should be no fluid that comes from that part of the refrigerator. Often times refrigerators are put into storage without defrosting the entire unit and the evaporator fins usually have some type of freezing build up. This melts and drips down the side walls of the refrigerator or drips onto the metal racks and a small amount of rust forms and then drips to the bottom. In the spring when temps increase and the liquid evaporates, it darkens and collects more bacteria/mold if the door is open. If it’s on the bottom, clean it out well with a bleach solution and next winter put a tub of Damp Rid in the bottom.
i have a winnebago view that annoyingly says “speed warning” when you get 5 mph over speed limit. Does anyone know how to get rid of this ?
Thanks for visiting the RV Repair Club. Usually the speed warning signal is coming from the GPS part of the electronic system? You should be able to reset it at a higher speed. Instructions would be in the GPS manual rather than the Mercedes regular operation manual. (ZD: 3662)
My furnace fan runs continuous. Must remove the fuse to shut it off. Any suggestions?
Thanks for visiting the RV Repair Club site and the opportunity to assist with your furnace issue. You did not indicate the year or model of your furnace so it could be a variety of issues. First, check your thermostat for an on/off switch at the bottom. If it’s an Atwood furnace and you run out of propane with the switch on, the blower will run all the time. It’s a tough switch to get at so it might be hard to move. If you have propane and the furnace is actually blowing hot/warm air continuously, then it’s probably a faulty thermostat. Some residential thermostats have a fan switch on the bottom with an on/off position. In the off position, the fan only runs when the furnace is running. In the on position, the fan runs continuously moving or “cycling” warm and cool air throughout the house. Great for homes, not so good for RVs, make sure it’s in the off position. (ZD: 3564)
Water heater won’t turn on. The normal clicking noise doesn’t happen.
Thank you for this great site…we are first timers and you mentioned a lot of things we never thought of when we start opening up…..we used your list for closing it up last winter but its been a long winter.
Nothing comes out of the black or gray dump hose. The water is all clean, we haven’t used the toilet but we have flushed it ,and run the faucet in the sink.????
How do I check the dump hose?
Hi Jeanne. Thanks for visiting the RV Repair Club site. You indicated you do not get anything out of the black and gray water dump hose? The black water and gray water tanks are emptied through solid plastic pipe going to a valve that the dump hose hooks to. The hose is typically a corrugated hose that condenses for storage and extends for dumping and hooks to the outlet pipe. I assume you are referring to the actual black and gray water pipe going to the valve? If your hose is clean and you are not getting any water after opening the valves, then you have stuck or broken valves. If your rig is a travel trailer or 5th wheel, usually the valves are hidden underneath the rig and long extension handles are run to the side of the rig for accessibility. Often times these handles simple bend when pulled or pushed and it seems like you opened the valves when they are not. You might have to crawl under the rig to verify?