RV Sewer Hose Basics: Cleaning Attachments
RV Lifestyle & Repair EditorsIn recent years a number of RV dump stations around the country have been closed due to misuse and poor management, and many of those that have remained operational now require certain aftermarket attachments. There’s good reason for this, as using an RV sewer hose can be a messy task if you’re using just the basic setup, and campers tend not to do a good enough job cleaning up.
However, if you have the proper equipment and you follow the appropriate steps to complete the job neatly, using an RV sewer hose can be as stress free as any other maintenance tasks on the road. So in this lesson, to help you get in and get out of the dump station without any trouble, we teach you how to properly hook up your RV sewer hose, and introduce a few simple products you should add to your setup to simplify the job.
Tips for using an RV sewer hose
Because the standard RV sewer hose is made of ribbed plastic that expands and retracts for storage, cleaning and operating the hose can be a bit of a challenge. That is, unless you invest in a couple aftermarket attachments that take the stress out of emptying the tanks on your RV and keeping your RV sewer hose clean.
Managing editor Dave Solberg shows you how some basic components can save you a ton of time and hassle at the dump station. While attachments such as aftermarket elbows, water mounts and hose caddies aren’t essential for using an RV sewer hose, they will make a world of difference when you’re out on the road for extended periods of time. Look into investing in these inexpensive products for your RV sewer hose, and see what they can do to make your trips easier!
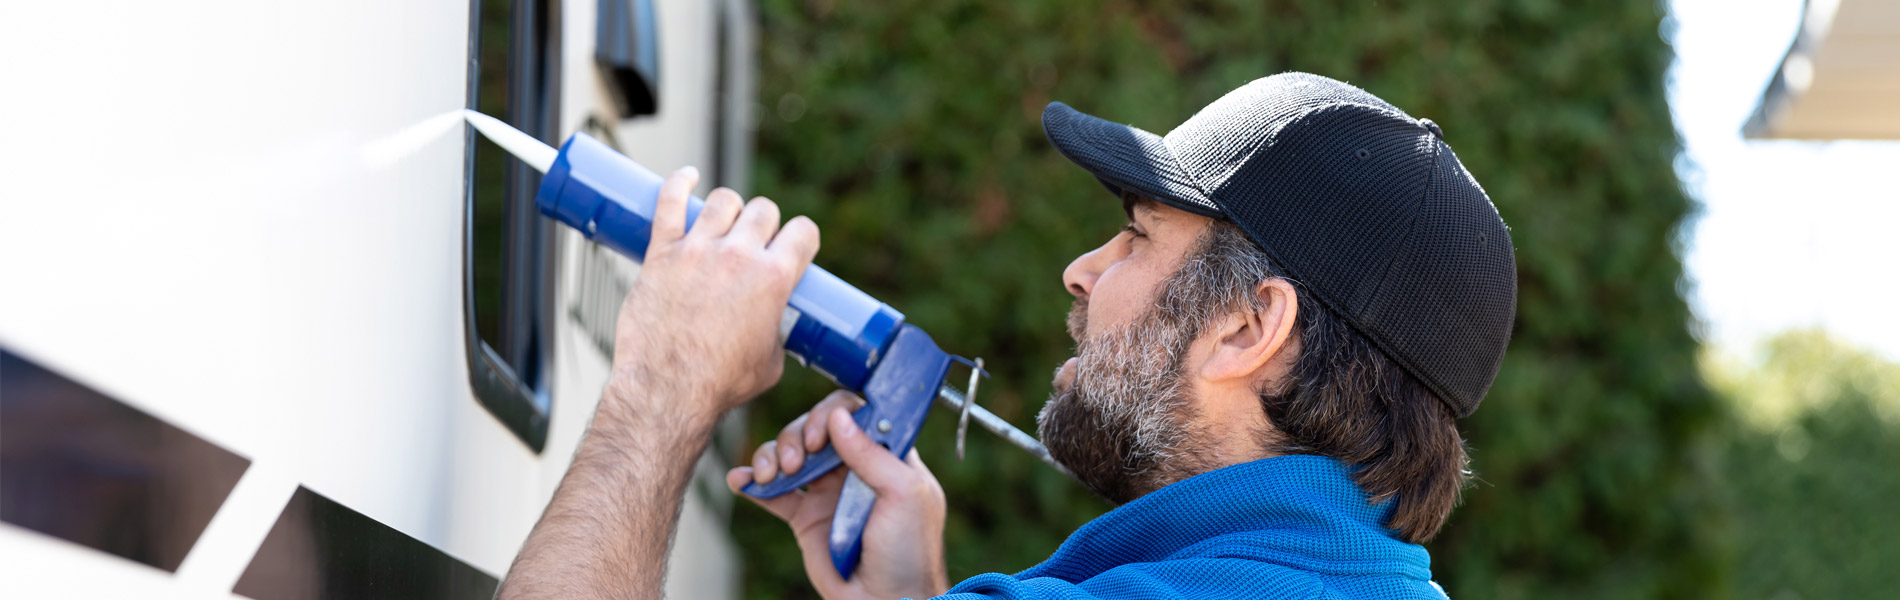
This is the typical dump hose that most manufacturers would include with an RV, whether it's a motor home or travel trailer. Comes with a banded end on here and an accordion hose. You're typically going to have to put a worm clamp on this. Now, there are some that are molded on here. A lot better connection.
You don't have to worry about this loosening up and getting spillage out of here. The challenge with this type of hose, [Speaker] as you can see, inside of it, it's got ribs. So, it's a lot harder to clean, but the reason for that is because it will expand, and then I can put it in this compartment, and it doesn't take up quite as much room as a full-length hose. Now, this is just gonna band at [Speaker] up on the top here. Like this.
And on this end, this is an aftermarket piece. Usually, you're just gonna have the end of here. Now, I could use this without this elbow, but when I put that into the dump station, typically, you're gonna have about a three or four-inch hole and a heavy lid over the top of it. When I put that down in, I run the risk. When I hit that valve, the weight of that fluid coming through there could literally pull that out.
I'd have to put a rock, or a brick, or something heavy on top of this. That's gonna put some stress on here. It could collapse this hose. [Speaker] It could cut it, eventually. Get some wear and tear.
So, it's nice to put an elbow like this. I don't have to make a hard bend with my hose. And this is a nice one, because it comes with the basic pipe in here. It has different steps for the larger and smaller hoses that you see. I've got the lip here, clamps down.
Now we're seeing a lot of the dump stations around the country closing. There were several at-rest stops over the years, but you see more and more closing, because people aren't taking care of them. You know, they're not cleaning up after themselves. They're not worrying about where all the stuff goes. So, a lot of them now actually require something like this for you to dump.
So, this one will fit into the opening. I put the lid back down. Some will even have a clamp on the top of it. So, it's a nice piece to have. Now, when I'm done dumping the station with the hose, one of the things that you can use instead of popping this off...
Here we go... And running a garden hose in here, and getting it to splash all over the place, I can just put this cap over the top of it. Hook a garden hose, and everything is contained. I don't have to worry about it splashing. There's another upgrade.
This would fit on automatically and stay on there. [Speaker] And then once I banded this on. Here. Like that. I do a quick connect for my hose, and then that would clean it, and I don't have to take it off, you know, do that.
And I can just throw my hose on the inside of it. One last little gadget here that I think is a great idea, is if you're gonna be at a campground for an extended period of time, if you've got a long distance that you're going, you can get an extra section of hose. I would definitely keep a second one. So, if I can't get close enough to the dump station for this hose, I can add a second one onto it, but we have this little item here. This is literally a hose caddy.
When I pull that out, that's gonna- that hose is gonna take off on me. It's gonna wanna straighten out if I need it to go a little bit of an angle or something, [Speaker] I can simply run this out To about 20 some feet. I can do any kind of angles I want with it. And that'll just keep my hose nice and secure. So, anytime I pull that out, I don't have to worry that it's gonna take off on me, and I'm gonna have to chase that hose anywhere around the yard.
Share tips, start a discussion or ask other students a question. If you have a question for an expert, please click here.
Already a member? Sign in
No Responses to “RV Sewer Hose Basics: Cleaning Attachments”