There are many reasons why you might decide to remove RV decals. The existing decals may not have been properly maintained and look worn or faded, they could be a style or color that you don’t care for, or you may want to replace them with your own personalized decals. Whatever the reason, there are many routes you can take to remove those unwanted decals! Here is what we have found to work best for us when removing decals from our RV’s exterior.
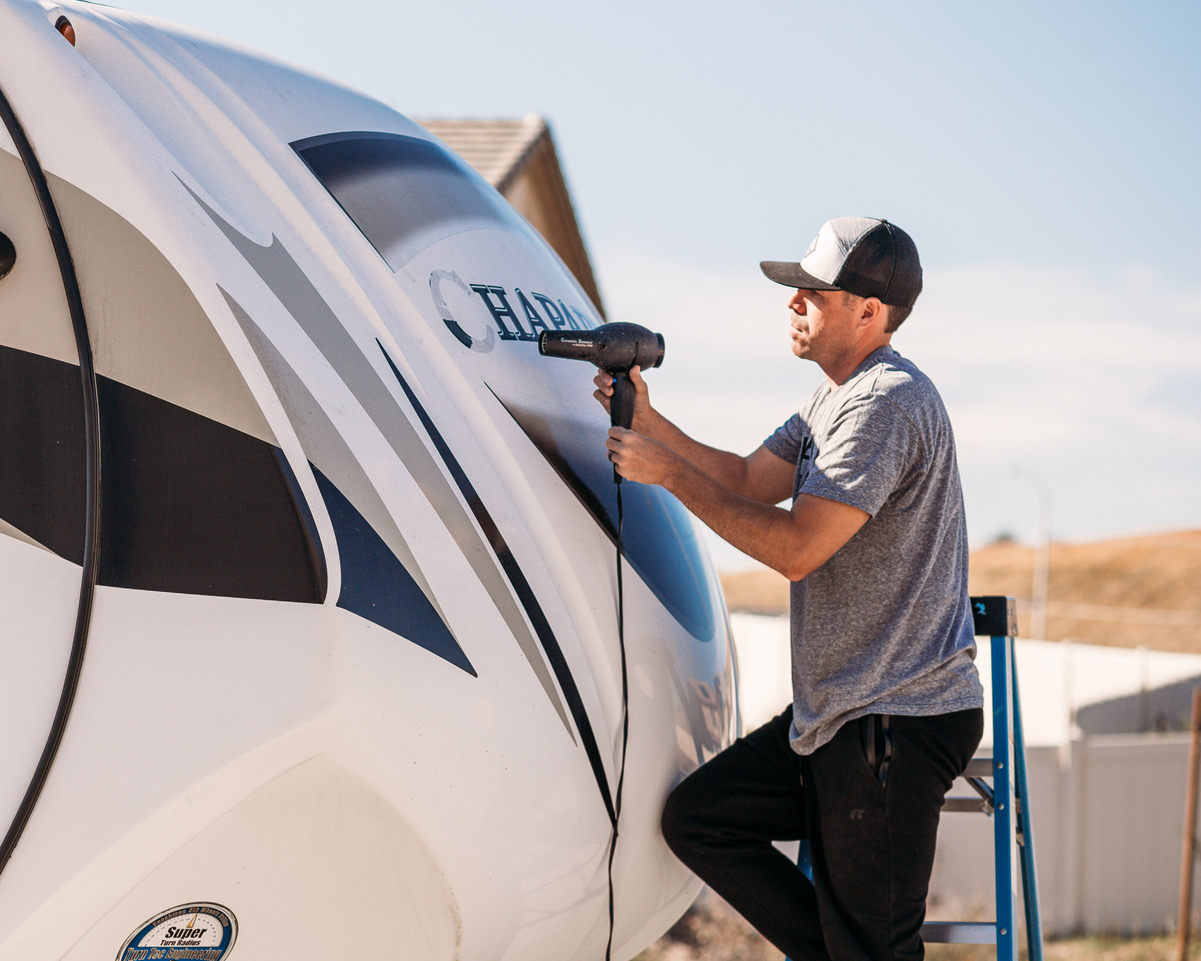
Step 1: Warm Up The Decal Adhesive
Everyone that removes decals seems to agree that HEAT is the best way to get started. People have tried different methods for applying the heat, and all of these have been proven to work! You can use a variety of different tools, we recommend:
- Hair dryer
- Steamer
- Heat gun
- Direct sunlight
Applying heat to the decal anywhere from a few seconds to a few minutes (depending on the air temperature) warms it up enough to be removed more easily. Parking the RV so that the decals are in direct sunlight for a few hours will make your job much easier. The warmer the air is when you try this project, the easier it is to peel!
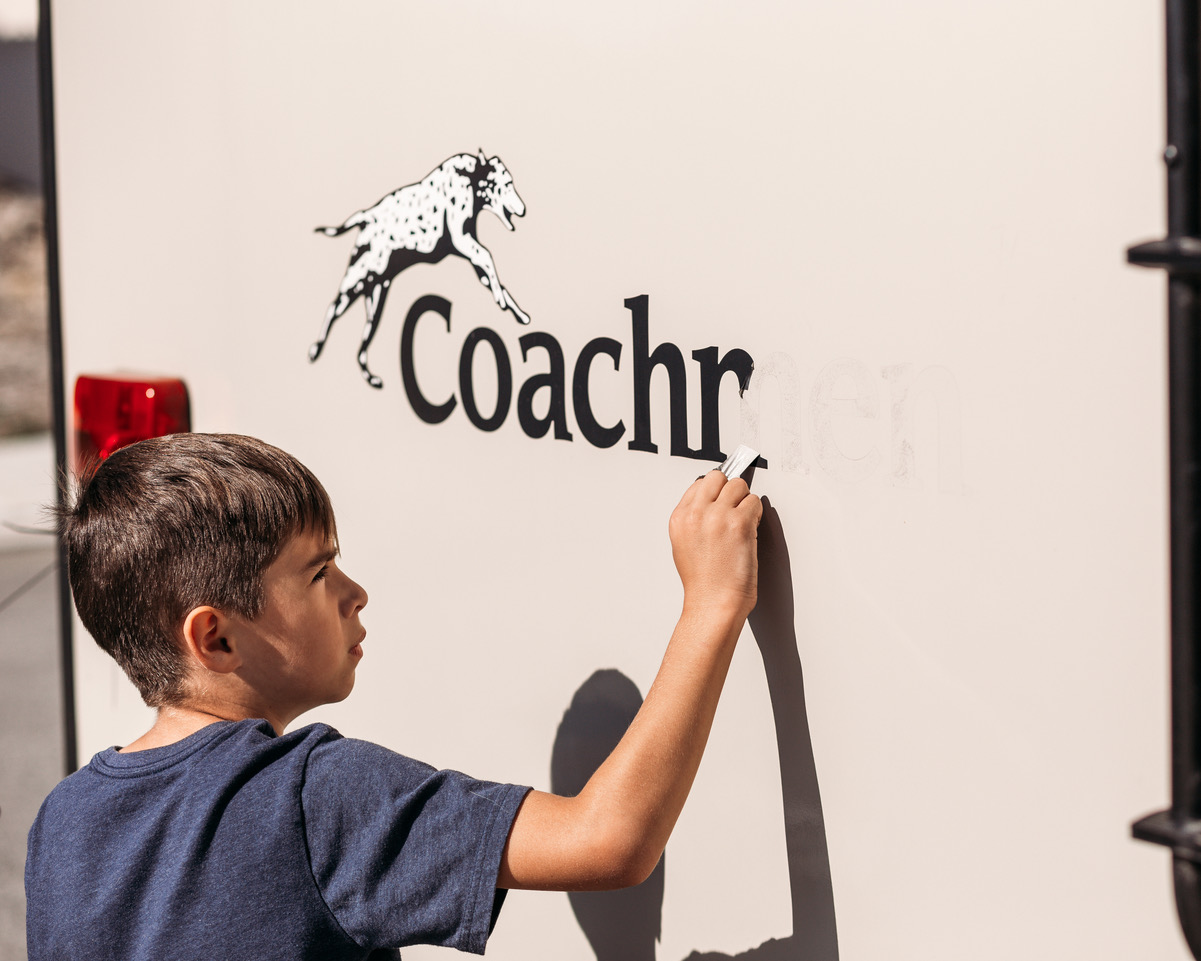
Step 2: Start Peeling The Decals
There are several tools that can assist in removing the decals. Sometimes your fingernail is all you need to get the peeling started. Other options include:
- Putty knife
- Razor (use carefully so you don’t scratch your RV!)
- Credit card
Depending on decal size, age, and air temperature, this might be a slow process. Your decal might peel off in very small strips, or it might peel off completely with one peel.
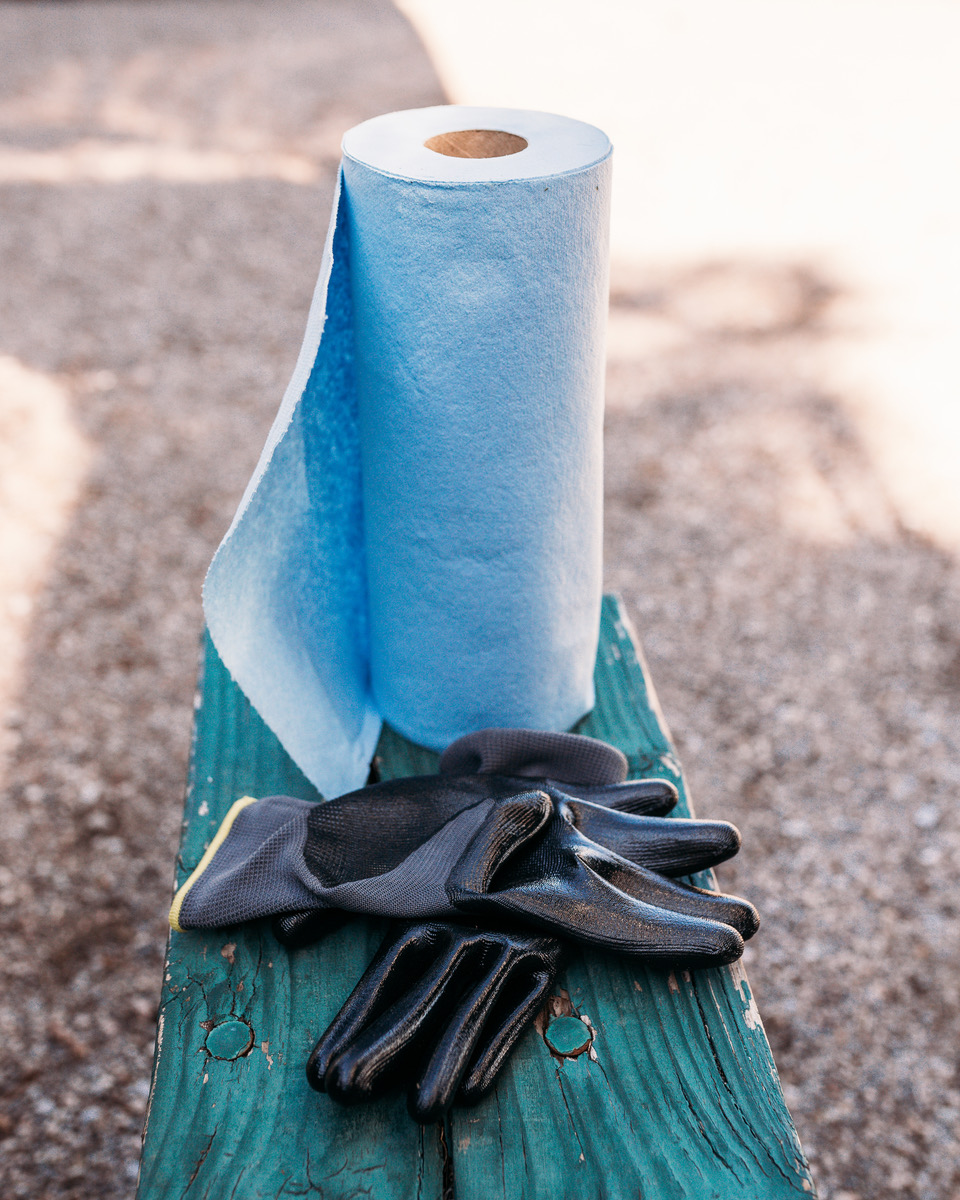
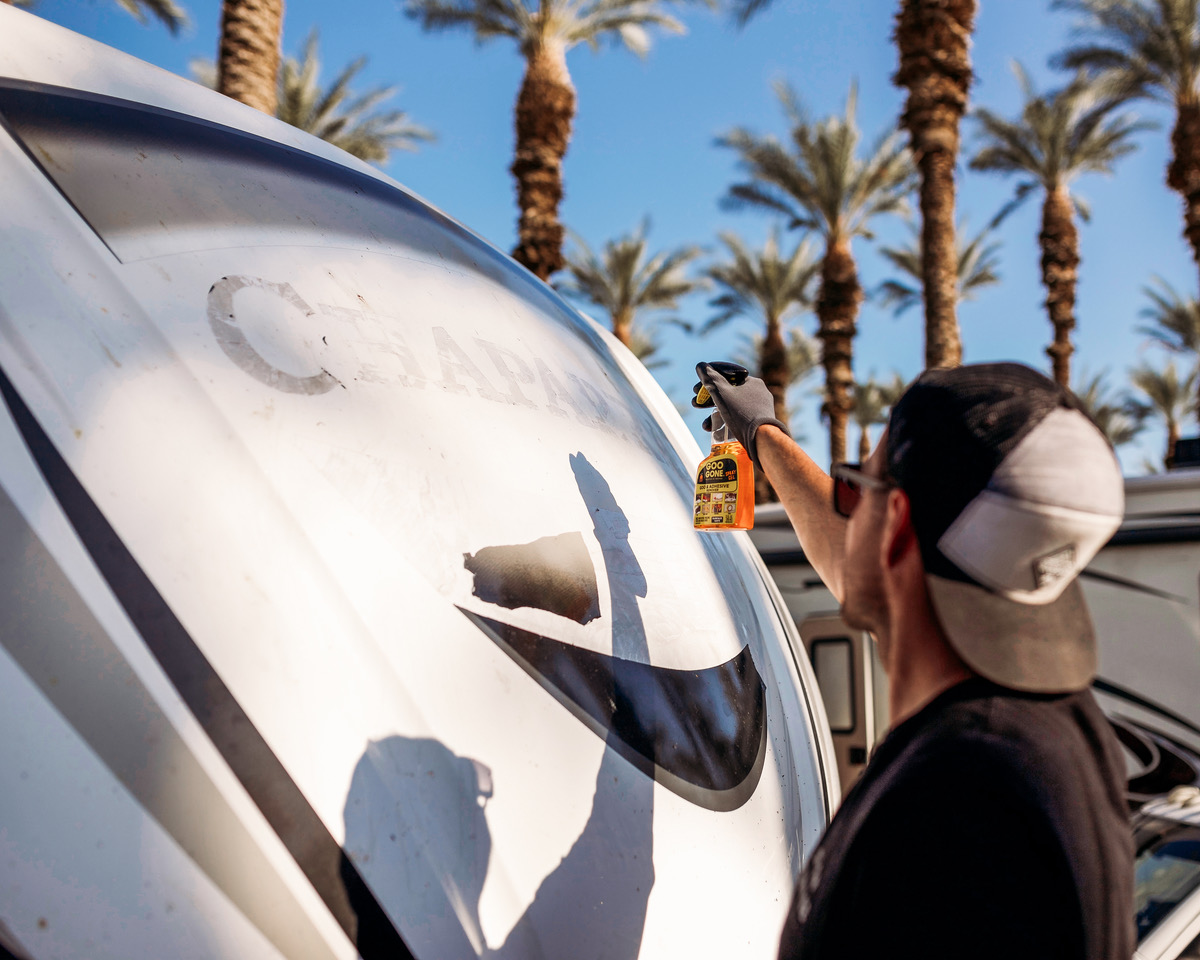
Step 3: Remove The Old Glue
You will need paper towels and gloves for this next step. After the decals have been removed, you will most likely have some glue that is left behind on the RV. There are several products you can use to help with the adhesive removal.
- Goof Off
- Rapid Remover Adhesive Remover
- Goo Gone
- 3M General Purpose Adhesive Remover
Simply apply the cleaning product onto the glue as instructed (with a paper towel or spray directly onto the RV), and let it sit on the surface for a few minutes. Using one of the scraping tools from the previous step, scrape the remaining glue off.
Your putty knife, razor or credit card should easily scrape off the adhesive after the cleaner has been applied.
Step 4: Remove Any Oxidation
After the glue is gone, you may still have some “ghosting” where the decals used to be. These ghosts are caused by the oxidation discoloring the area around the decals. You’ll have to remove the oxidation on the vehicle’s surface to match the color beneath the vinyl that has been protecting its surface area from oxidation.
A heavy-duty oxidation remover, such as Meguiar’s Marine/RV Heavy Duty Oxidation Remover, is what you need for this final step! This product will restore weather-exposed surfaces, reducing ghost images from vehicle surfaces covered by graphics. Work a section at a time using a small amount of product on a 100% cotton terry cloth towel. Rub thoroughly into the surface with moderate pressure. Immediately wipe with a separate cotton terry towel. Do not let the product dry on the surface.
Your RV is now rid of the unwanted decals and you can enjoy the blank surface or apply new decals!

You might also be interested in:
How To Fix RV Delamination
Buying a Used RV: Inspecting The Exterior

Lauren is a wife, mother of two, photographer, blogger and lover of nature and adventure! Currently traveling around the U.S. in a fifth wheel, Lauren and her family seek to live life to the fullest and continue to look for ways to simplify their lives in order to live larger with less. Follow along on their journey by visiting their family travel blog.
 About the Author: Lauren is a wife, mother of two, photographer, blogger and lover of nature and adventure! Currently traveling around the U.S. in a fifth wheel, Lauren and her family seek to live life to the fullest and continue to look for ways to simplify their lives in order to live larger with less. Follow along on their journey by visiting their family travel blog.

Help. While vacationing at Lake Pleasant in Arizona, we were "hit" by a gel coat scammed. Our '15 fifth wheel had too much oxidation from bad maintenance. A guy (40's) came buy, promising to add a top gel coat that would "fix everything ". We bit, handed him cash, and he brushed on something that made it shinier, but left gobs of runs. He never answered our calls after that. He should be in jail!! Don't fall for drive by scammers!!
What camera do you recommend for a new starter in photography?
The old type single edge razor blades also come in hard plastic. Work well.
what camera do you use. I want to photo wild horses and am now using a cell phone.
GENERATOR DOES NOT TURN OVER, CAN NOT START IT! HELP
Very proud of how easy it absolutely was to wash with a car wash mitt, sprayed on and therefore the shine came back immediately. Decal colors also returned. the following day there was a tiny low amount of wax chipping on the black decals, but this was easily wiped off with a microfiber. but 1/4 bottle of TR Wax used, 29ft RV.
use a rotary eraser.fits in any drill.will not do any damage to finish underneath decal.
How to get the warning stickers off
<strong>Ticket 35305 Decals have completely turned to junk, brittle and will not peel off even with heat. The glue i have tried many products to remove it and still no luck.... ie. goof off, adhesive remover, eraser on a electric drill, Steam cleaner etc.
How do I remove the front window cover & reline insulation strip