Repairing Laminate on Your RV Counters
Carol JacksonDon’t throw out that damaged laminate! A scratched, cracked, or peeling laminate countertop is not a lost cause. In fact, repairing laminate is often significantly more cost effective than replacing it, and with a little bit of finesse you can end up with a result that’s similarly attractive. In this step-by-step video lesson, Carol Jackson of RV Inspection Specialists teaches you simple tips for repairing laminate on your RV’s countertops.
Repairing laminate issue #1: scratches and chips
The most common issue with laminate on RV countertops is the everyday scratch or chip. If you consider what laminate counters are made of — a thin layer of color atop many layers of pressed paper — this isn’t so surprising. Dragging or dropping a hard item on your counter is liable to damage it without much ado.
When it comes to repairing laminate counters that are dark colors such as black, grey or brown, you can occasionally use a Sharpie to color in small chips and scratches. Just use your finger to blend the color, and follow it up with an epoxy or clear nail polish. For more unique counter colors, you can pick up something like the Fix-a-Chip Repair Kit. These kits come with several color wells, which you can try combining to mix the appropriate color for your repair, and then use the complementary hardener to finish the job.
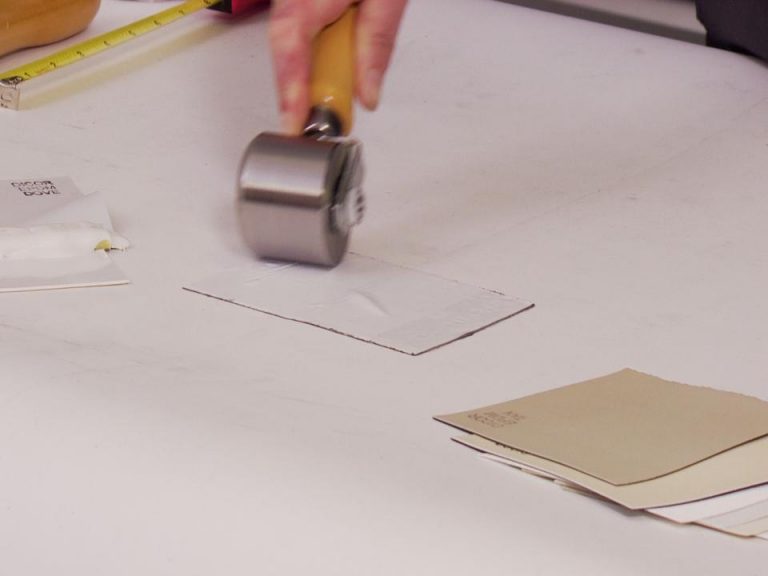
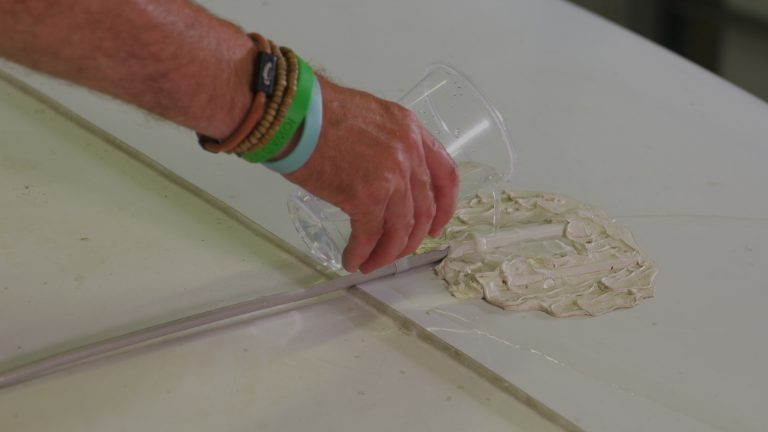
In the case of Carol’s “marble” laminate, you’re better off using SeamFil, which is the tool professionals prefer for this kind of job. SeamFil comes in various colors, and can be applied with a very sharp putty knife. Carol shows you the best way to prep your surface with acetone, and then walks you through the process of repairing the counter’s damage.
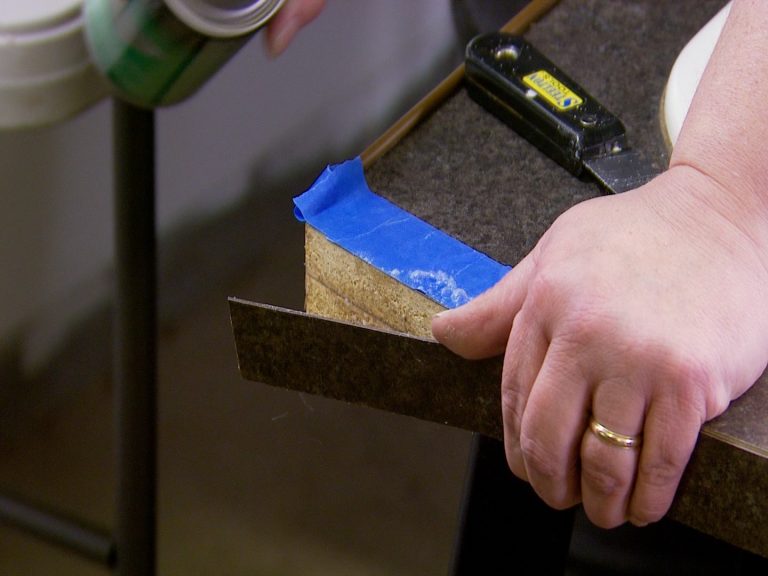
Issue #2: peeling edge banding/corners
Another common problem that can leave your RV countertop looking subpar is the peeling edge. This happens when a countertop’s adhesive wears away, causing the laminate and the particle board or other hard surface to separate. You can easily remedy this issue with your putty knife, a household iron, painter’s tape, and a spray adhesive such as 3M’s Hi-Strength 90 Contact Adhesive.
Carol demonstrates the best way to use your putty knife to clean away old adhesive, particleboard, and dirt and debris from the back of the laminate. She then uses her iron to heat up the laminate and its adhesive to peel back the material a little more. There’s a good reason for this, which Carol explains!
With her surfaces cleaned and ready to be stuck back together, Carol masks the edge of the counter in painter’s tape. She then applies contact adhesive to both surfaces, and waits a minute or so for the surfaces to become tacky (similar to rubber cement, spray adhesive works best when adjoining surfaces have more to grab onto). Press the sides together, rubbing along the edges to get a good seal, and then use a clamp to hold that seal for about an hour. And voila, you’re repairing laminate like an expert!
Issue #3: broken portions
Lastly, Carol demonstrates how to perform a “Dutchman.” This is a patch using a cutout material to fill a larger portion of laminate that’s either broken off or needs to be replaced. On Carol’s sample bathroom sink setup, she’ll be conducting a Dutchman on the edge banding. Follow along as she shows you the tips and materials you’ll need to complete your own repair!
Explore videos by Carol Jackson

You may be interested in


Premium Membership
Unlock exclusive member content from our industry experts.
- 24/7 Access to Premium RV Maintenance Videos, Travel Inspiration, and Lifestyle Tips
- Step-by-Step Instructional Demos, Projects, and Guides
- 50% Off Video Downloads Purchased in the RV Lifestyle & Repair Shop
- Access to Ask the Expert Program
Unlock exclusive member content from our industry experts.
- 24/7 Access to Premium RV Maintenance Videos, Travel Inspiration, and Lifestyle Tips
- Step-by-Step Instructional Demos, Projects, and Guides
- 2 Full-Length Video Downloads to Watch Offline
- 50% Off Video Downloads Purchased in the RV Lifestyle & Repair Shop
- Access to Ask the Expert Program
Gold Membership
$333 Value
Get everything included in Premium plus exclusive Gold Membership benefits.
- 24/7 Access to Premium RV Maintenance Videos, Travel Inspiration, and Lifestyle Tips
- Step-by-Step Instructional Demos, Projects, and Guides
- 9 Full-Length Video Downloads to Watch Offline
- 2 Full-Length RV Repair Classes to Keep for Life
- Discounts on Purchase-to-Own Content in the RV Lifestyle & Repair Shop
- Access to Ask the Expert Program
- Exclusive GOLD LIVE Streaming Events